In workshops and production lines we always need to sort our hand and power tools and keep them in fixed places to reach them quickly and easily without wasting time and effort in looking for them and this what is called 5S: Sort, Straighten, Shine, Standardize, and Sustain. The following are some concepts showing how to allocate a fixed place for each tool.

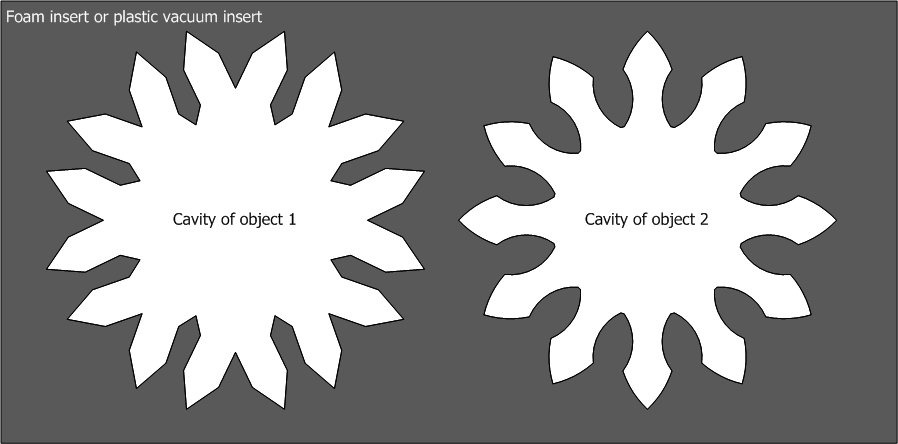


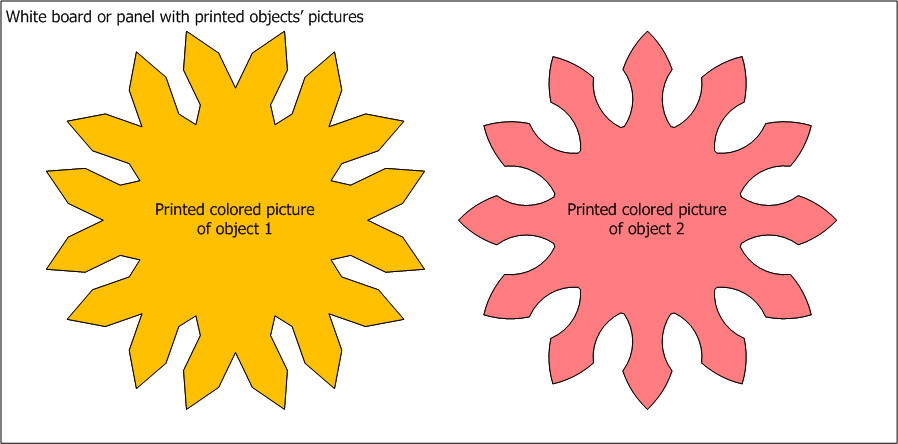


First of all, imagine that we have two pieces of tools or objects like in the image below.
The first method is to use a foam insert or a vacuum-formed plastic inserts. This method is the best as it provides good fixing and cushioning for tools.
The second method is to make a monochromatic color shadow for objects with high contrast (white board and black shadow). This shadow board is easy to recognize from far distances.
The third method is to make a thick outer contour lines for objects.
The forth method is to print colored pictures for objects, so the objects will be placed on their pictures. Pictures may be 1:1 scale, or may be a reduced or enlarged scale. It is preferred to have a picture with an orthogonal view for the object as it will be viewed on the board.
The fifth method is to use name labels only, so tools will be placed above or under their labels. This method is the worst method to use for sorting tools specially if a tool has more than one name, or if there are different tools having the same name but different sizes (like wrenches, screw drivers, drill bits,... etc).
The sixth method is stick labels on both tools and board. Each label will have a unique code.
Method number 7 is to use samples or demos. This method is almost used with consumable objects like tubes, hoses, tapes, screws, paints, electric terminals, wires, cables, plugs, blades, drill bits, ...etc. For example, in case of adhesive tapes, you can cut a small square piece of each tape and paste it on the board.
Notice that more than one of these methods can be used at the same time.